If you are looking for a manual WordPress install guide on VPS/local server, please check the below steps:
Since its conception in 2003, WordPress has been one of the best and easiest ways to get a stylish site up and running. In fact, recent trends show that its popularity is just increasing. WordPress is easy to use, and hosting it yourself isn't difficult, as we'll show you in this article.
In this post, we'll show you how to host your WordPress site on Ubuntu Linux. We'll install Apache as our HTTP server, as well as PHP and MariaDB (an open source MySQL implementation), because WordPress requires them. This collection of programs is usually referred to as a LAMP stack (Linux, Apache, MySQL, PHP). After those programs are installed, we'll go over Apache and MySQL settings, including initial database and user setup, before installing WordPress. Finally, we'll teach you how to install a self-signed SSL certificate or get a free one from Let's Encrypt, allowing your site to use HTTPS.
This tutorial will teach you:
- Installing and configuring Apache
- Installing and configuring MariaDB for MySQL
- How to Create a WordPress MySQL User and Database
- How to Get and Install WordPress
- How to Install a Self-Signed SSL Certificate on a WordPress Site
- How to Setup a Let's Encrypt Free SSL Certificate
1. Installing and configuring Apache:
The first step will be to install the necessary software packages on our Ubuntu machine. WordPress can only function if we supply it with an HTTP server, PHP and its associated modules, and a MySQL database. To install Apache, PHP, and MariaDB, an open source fork of MySQL, open a terminal and enter the following commands:
$ sudo apt update
$ sudo apt install apache2 php libapache2-mod-php mariadb-server mariadb-client php-mysql php-curl php-xml php-mbstring php-imagick php-zip php-gd
This is a large number of packages to install, and they are all essential. You will not receive a perfect score in the "Site Health Status" area of the WordPress administrator dashboard unless you install some more PHP modules.
2. Installing and configuring MariaDB for MySQL:
One of the initial steps should be to prepare our WordPress database. To do so, we must first perform some basic MySQL configuration. To begin, type the following command into the terminal:
$ sudo mysql_secure_installation
Press enter after leaving the first response blank. You should answer y (yes) to the remaining prompts and set a root password when required. This setup takes only a few seconds to finish.
Although the following configuration will enough for our WordPress site, if you want to go a bit deeper, you may read our post on Install and Configure MySQL Workbench on Ubuntu Linux.
3. Create a WordPress database:
MySQL is where WordPress keeps all of its post and page content, as well as other information. With the following steps, we will create a MySQL user and database for WordPress to access:
Begin by launching MySQL as the root user:
$ sudo mysql
Make a new WordPress database. In this example, we'll call it wordpress_db, but you can call it whatever you like.
MariaDB [(none)]> CREATE DATABASE wordpress_db;
Next, we need to establish a new user that WordPress may use to access the newly formed database. In this case, we'll use the username wordpress_user and the password my_password. Replace the following text with a secure password (and save it somewhere safe):
MariaDB [(none)]> CREATE USER 'wordpress_user'@'localhost' IDENTIFIED BY 'my_password';
Then, provide the WordPress user complete access to the WordPress database:
MariaDB [(none)]> GRANT ALL PRIVILEGES ON wordpress_db.* to wordpress_user@'localhost';
Finally, save your modifications to user permissions and quit MariaDB:
MariaDB [(none)]> FLUSH PRIVILEGES;
MariaDB [(none)]> exit
4. Set up Apache:
At this point, Apache should be installed and operating, which you can confirm by opening a browser and visiting to loopback address 127.0.0.1 or just localhost on your system.
Although Apache is already hosting our site (or lack thereof), it is great practice to create a new Apache virtual host file for our WordPress installation. This will provide you greater freedom in the future if you want to host numerous websites or modify the location of the WordPress directory, for example.
Step 1: Using the following command, copy the default Apache configuration into a new file:
$ sudo cp /etc/apache2/sites-available/000-default.conf /etc/apache2/sites-available/wordpress.conf
Step 2: open this file in nano or your preferred text editor:
$ sudo nano /etc/apache2/sites-available/wordpress.conf
Step 3: Change the DocumentRoot setting to the location where we intend to install WordPress. Our recommendation is the directory listed below.
DocumentRoot /var/www/wordpress
Step 4: Create a ServerName option and input the fully qualified domain name of your website. If you don't have one, use localhost.
ServerName mydomain.com
Step 5: Also, make an alias for the www prefix. If you're only utilizing localhost, this isn't necessary.
ServerAlias www.mydomain.com
When you're through, your config file should look like this. Because we are only hosting locally, we commented out the alias line in our configuration.
Step 6: Save your modifications and then close the file. Then, in Apache, enable the site and disable the default site.
$ sudo a2ensite wordpress.conf
$ sudo a2dissite 000-default.conf
Step 7: restart Apache to have the new changes take effect.
$ sudo systemctl reload apache2
5. WordPress should be downloaded and installed.
Now that our HTTP server is configured and PHP and MySQL are up and running, we can proceed to the WordPress installation.
Step 1: use wget to get the most recent version of WordPress:
$ wget -O /tmp/wordpress.tar.gz https://wordpress.org/latest.tar.gz
Step 2: Extract the tar archive into the WordPress site directory as follows:
$ sudo tar -xzvf /tmp/wordpress.tar.gz -C /var/www
Step 3: Make sure that the directory and all of its files have the necessary permissions.
$ sudo chown -R www-data.www-data /var/www/wordpress
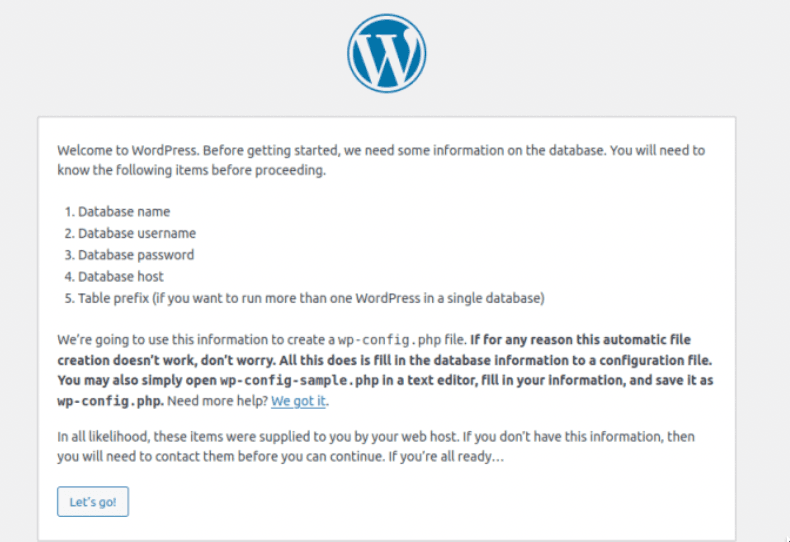
Step 4: We can now get started setting WordPress. Open your web browser and go to the localhost address 127.0.0.1 or, if you have one, your fully qualified domain name. The WordPress setup wizard should greet you. To begin, click "Let's go."
Step 5: Enter the database information that you previously specified. The final two items (database host and table prefix) can be left alone. When you're finished, click "Submit."
Step 6: WordPress will attempt to connect to the database and notify you if it is successful. Assuming it was, proceed by clicking "Run the installation."
Step 7: The following screen will request some general information about your new site. When you're finished, click "install WordPress" at the bottom of the screen to complete the installation.
Step 8: WordPress installation is now finished! You can begin creating content by clicking the "log in" button.
Step 9: Remember that you may always utilize the URL http://127.0.0.1/wp-admin to return to the WordPress admin panel in the future (or replacing 127.0.0.1 with your fully qualified domain name, such as mydomain.com).
You should now be able to access your WordPress site through http://127.0.0.1 or your fully qualified domain name.
6. Set up a self-signed SSL certificate.
We've finished configuring our WordPress site, however it's still utilizing HTTP rather than HTTPS. With so much of the web shifting to HTTPS, you may want to consider it for your site as well, even if it isn't absolutely necessary. In this portion of the book, we'll teach you how to use a self-signed certificate to enable SSL on your website.
Step 1: To generate a self-signed certificate, enter the following command into the terminal. You'll be asked a few general questions. Make sure to enter your website's IP address or fully qualified domain name in the "common name" column.
$ sudo openssl req -x509 -nodes -days 365 -newkey rsa:2048 -keyout /etc/ssl/private/apache-selfsigned.key -out /etc/ssl/certs/apache-selfsigned.crt
Step 2: we must make some adjustments to our Apache site settings. With nano or another text editor, open the default SSL configuration file:
$ sudo nano /etc/apache2/sites-available/default-ssl.conf
Step 3: Change the DocumentRoot value to the location where WordPress was previously installed. Then, modify the SSLCertificateFile and SSLCertificateKeyFile values to point to the location of our SSL files.
DocumentRoot /var/www/wordpress
SSLCertificateFile /etc/ssl/certs/apache-selfsigned.crt
SSLCertificateKeyFile /etc/ssl/private/apache-selfsigned.key
Step 4: Save your modifications and then close the file. Then, for the modifications to take effect, enable the SSL module for Apache and restart it:
$ sudo a2enmod ssl
$ sudo systemctl restart apache2
Step 5: Finally, activate the SSL site that we created and restart Apache:
$ sudo a2ensite default-ssl
$ sudo systemctl reload apache2
All done. Your WordPress site is now capable of using SSL encryption:
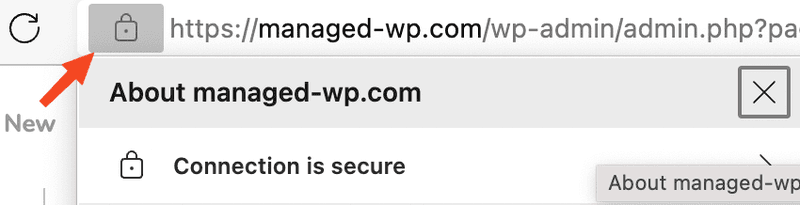
7. Configure a Let's Encrypt free SSL certificate.
Let's Encrypt is a free service that delivers SSL certificates to websites. If you've gotten this far and set up your WordPress site on Ubuntu, there are only a few more steps to establish SSL encryption, which prevents man in the middle attacks, improves your page's SEO, and prevents browsers like Firefox from warning users that your site is insecure.
This procedure is quite simple and may be completed entirely from the Ubuntu command line. Follow the steps below to finish installing an SSL certificate from Let's Encrypt on your website.
Step 1: Install the certbot software with the following command to enable SSL encryption with Let's Encrypt.
$ sudo apt install certbot python3-certbot-apache
Step 2: Configure the SSL certificate by running the following command and following the prompts that appear. The final question will ask if you wish to redirect HTTP queries to HTTPS. It is advised that you choose this option. Obviously, the domain must correctly point to our publicly visible server IP for this to work.
$ sudo certbot --apache
That's the end of it. The certbot utility does practically all of the heavy lifting for us, making all of the necessary adjustments to your Apache virtual host files. It will also renew your SSL certificate when it is due to expire, keeping it active.
Why you should choose Managed-WP.™ PRO?
Instead of spending hours on setting up your Ubuntu Linux OS, Apache Web server, MySQL and Install WordPress. We provide WordPress-as-a-Service and deploy fully optimized WordPress in mins. Please check the below steps and start your WordPress site in the easiest way.
Check the steps below:
Step 1: Open https://pro.managed-wp.com/dashboard
Step 2: Click "Add site"

Step 3: Enter site name, URL and required info in below.
Step 4: Select required resources.
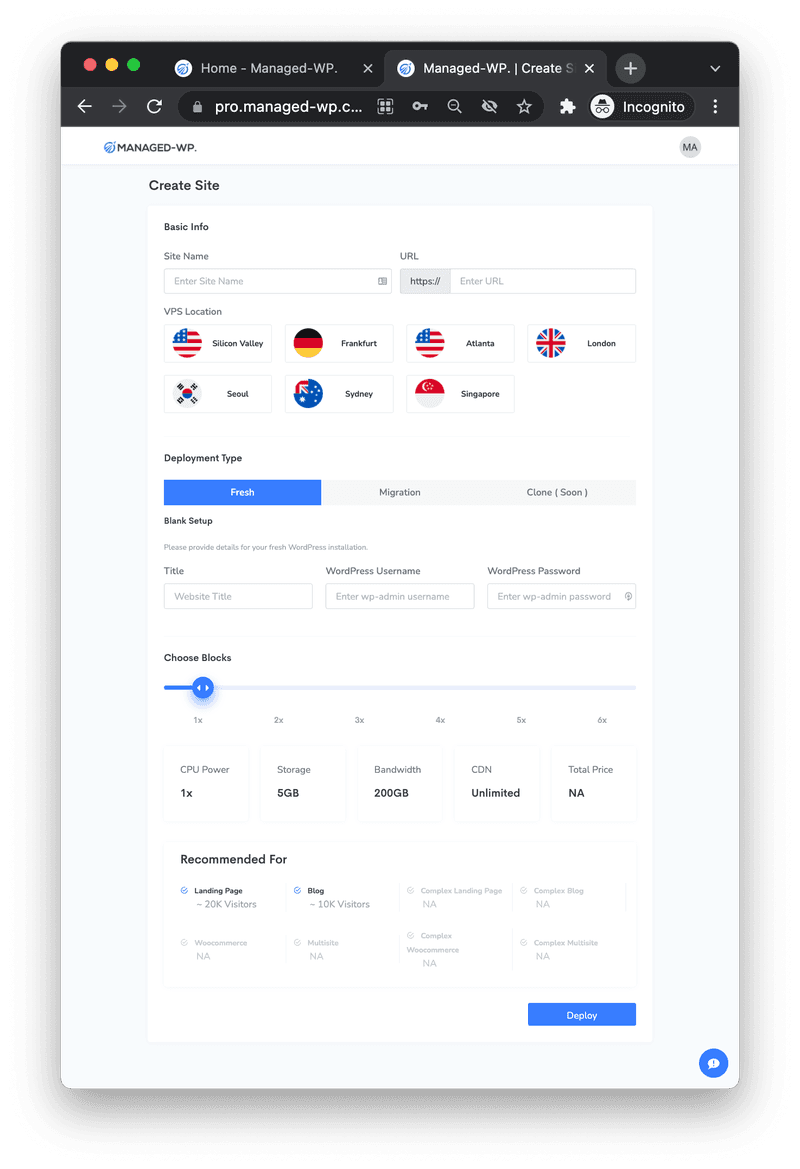
Step 5: Finally, click "Deploy" and the WordPress will setup be completed in few mins.
Step 6: Connect Primary Domain and Enable SSL:
After you create a new WordPress site, you will see a notification bar (red color).
- Click it and you will see the popup to enable live domain.
- Update DNS record base on the info in the popup.
- If you are not using Cloudflare or your cannot connect successfully, please click "show DNS Rocoard without Cloudflare>>"
- Then click "ENABLE SSL" to generate free SSL certification for connected domain.

Step 7: (Optional) Connect Primary Domain:
- visit https://pro.managed-wp.com/domain
- Add 2nd custom domain ,enter the domain in "CUSTOM DOMAIN", then click "add"
- Click "List" under "Category" , and you will see all connected domains.

Tips: create your Managed-WP.™ PRO account with code “TRIAL10” and get $10 free credit now!