Are you looking for a profitable side hustle or want to open up a new passive income stream? If you have skills or expertise in a particular area – be it computer programming, a foreign language, or anything else – making money online is easy.
How? Sell an online course in your area of expertise. Fortunately, you can easily create successful online courses with WordPress. That is too with a very small investment and no advanced technical knowledge. With your own online course websites, you can make a considerable amount of money, especially if you focus on a particular niche or two.
For selling online courses, we recommend creating a self-hosted eLearning website instead of selling through sites like Udemy, Coursera, edX, etc. With the former option, you will enjoy better flexibility, full ownership, and full control over the content and revenue. We will discuss this in detail later in the post.
You can put your knowledge online in the form of well-crafted online courses easily by choosing a popular WordPress LMS plugin, like TutorLMS.
But, there are many steps to set up your online learning website and get it ready to launch. To make things easy, we have compiled this in-depth guide that walks you through the entire process of building your online course platform in WordPress from scratch.
Let us get started:
Is Selling Online Courses Profitable?
The quickest answer is yes! Selling online courses is profitable both – financially and professionally.
The education sector in the 21st century is swiftly shifting from classroom learning to eLearning, thanks to technological advancement. Both students and instructors are leveraging eLearning to fulfil the expectations of today’s digital native student population.
As a result, the global e-learning market is expected to be worth $325 Billion by the end of 2025. E-learning has resulted in income increase for 42% of US companies. Also, eLearning increases retention rates by up to 60%.
These figures give a fair idea of how online courses are taking over the education industry. And, this flourishing tech-forward sector provides numerous opportunities for upcoming entrepreneurs to get paid for sharing their skills and knowledge.
By setting up your own LMS site, you can achieve the following benefits:
# Earn Passive Income
Online courses are sold over and over again with almost the same content. So, you can expect to earn significantly by selling many online courses via a self-hosted website.
After putting in initial efforts, you can earn money while on autopilot. You would keep attracting learners who are potentially interested in your offerings.
# Reach wider audiences
By launching online courses, you can reach out to more learners in the world. You would not be able to reach them otherwise. An LMS platform gives you many opportunities to expand your business while breaking any geographical barriers.
Simply develop the course idea, create your project, launch it and share it with others. Being online gives an opportunity to sell your courses to a global audience.
# Cost-Effective
No need to pay rent or maintenance charges for premises. Minimal paperwork! No shipping costs involved!
From crafting to launching and marketing your course, most aspects are carried out online. This saves you a lot of money.
If you choose a WordPress plugin like TutorLMS, you do not need to spend a significant amount of money on maintenance of your eLearning platform. Everything is well taken care of. So, you can have peace of mind.
# Ease of Management
You can easily manage your LMS website from anywhere. You can choose any place in the world to manage your online institute. All you need is a laptop with a fast internet connection.
You get full control over the whole online institute. You can improve the whole user experience by utilizing the features provided in the TutorLMS WordPress plugin.
# Students Stick Around Longer
When you sell a full library of courses on your eLearning platform, you earn a unique loyalty in your audience. As your website grows with new content, it becomes a preferred platform for learners who want to acquire new skills.
Deliver high-quality content consistently, and the whole ecosystem attached to you will benefit. As a result, you will experience better conversion rates across all courses. Other benefits include higher lifetime customer value and a manageable workload.
# Flexibility
Being an online content creator, you can work at your convenience. You are not restricted by the mundane 9 to 5 schedule. You can choose to work as and when you want. What is more! You can take days off as per your needs.
Make sure you design work schedules that make you productive. Moreover, self-discipline always pays off. So, utilize this flexibility in a better way.
How do you Make an Online Course Website in WordPress
First things first! You might wonder why use WordPress over other platforms. You can use other platforms to easily set up and run your online courses easier than it is with WordPress.
Then, why WordPress?
- Fully-Customizable
WordPress gives you the ability to fully customize your website. In comparison, other platforms allow a very limited degree of customization when it comes to the look and design of your courses.
You can customize everything, from templates and brand colors to logos, images, and text. There are thousands of options, themes, and widgets available to create a dreamy eLearning website.
- Cheaper
Though it involves an initial investment, it’s significantly low. You need to buy a domain, web host, and a license for an LMS plugin like TutorLMS for a reasonable cost.
On the other hand, when you choose hosted platforms for your courses, you end up paying for plans with hefty price tags.
When it comes to choosing the best WordPress LMS plugin, you have many options. However, TutorLMS is the most recommended one. So, we will do this step-by-step tutorial for building an online course website using TutorLMS.
Note that a WordPress LMS plugin is specifically designed to offer a highly immersive learning experience for learners through gamification rather than simply persuading them to buy a membership and start learning.
What is TutorLMS?
Whether you are an educational institution or an individual instructor, the TutorLMS WordPress plugin is the reliable way to go. It’s basically a drag-and-drop frontend course builder. Using this advanced plugin, you can create intuitive and in-depth courses, assignments, attractive quizzes, and lessons on almost all kinds of topics.
All features in this complete and robust WordPress LMS plugin hits all checkpoints of a full-fledged eLearning marketplace. Using this simple yet powerful WordPress plugin, you can easily create a profitable online learning website like Coursera and Udemy. You can easily manage, administrate and monetize your knowledge, online courses, and online academy without writing a single line of code.
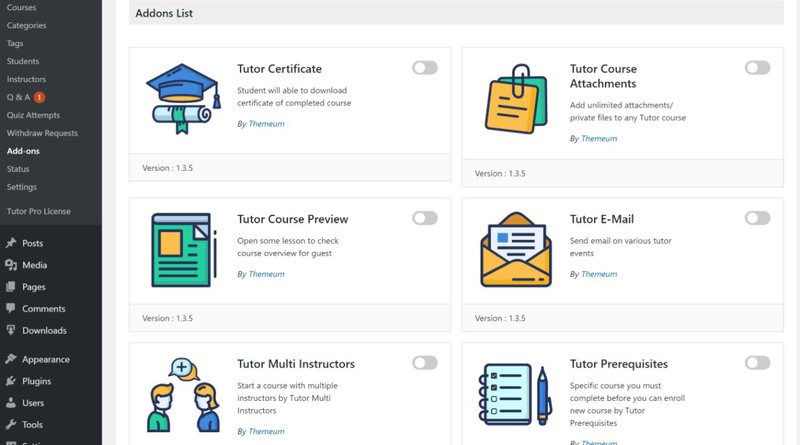
Another fascinating part is that you can use TutorLMS for free. You can opt for premium high-quality addons to add advanced functionality to your online course website. The lightweight LMS plugin offers addons to enable e-mail notifications, certificates, shopping cards and much more.
Features of TutorLMS
The biggest reason for the increasing usage of the LMS software in businesses and institutes is its features. Here’s a small list of some of the most common features that you will get with an LMS.
# Personalization
The LMS comes with drag-and-drop features. It lets you design and modify your pages according to your needs. It also includes some templates and theme packages that you consider for the pages.
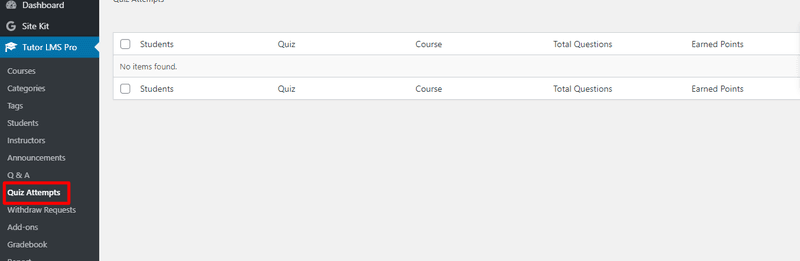
# Automation
The best part of LMS is automation. For instance, if you create a quiz, you don't need to assign it manually. Simply select the group and the software will send it to the eligible users. The application can also compare the answer of each user with the right answer and assign scores.
LMS is also good to compare the score to calculate the progress level.
# Centralization
No matter how you use the LMS or how many members you add, the central control always remains with the admin. The admin can set access levels for instructors, students, and others accessing the data. It's also possible to add new users and remove the existing accounts using this account. Basically, you always remain the central power.
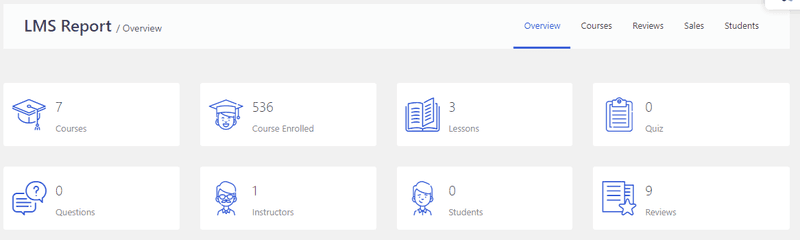
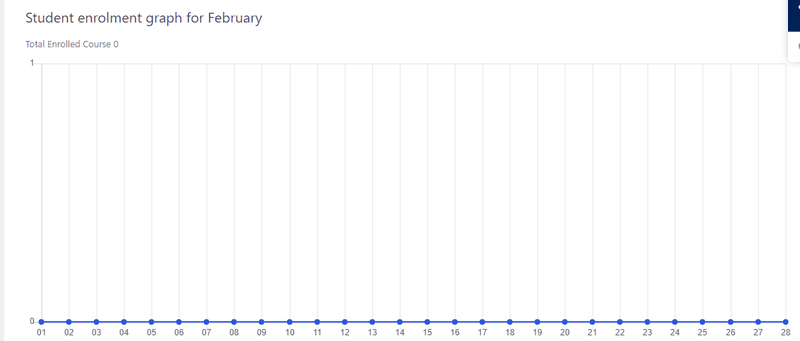
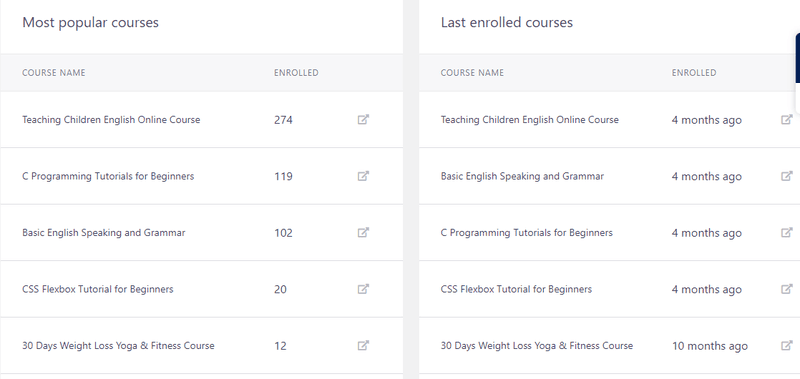
# Analytics and Reporting
The Leaning Management Software includes all sorts of analytical tools that you would need for your courses. It can provide you insights about the users accessing your data, their progress, performance in each test, and also keep count of attendance. You can get the data in both metric and graphical form.
# Security
The learning management system may allow multiple users to access your loaded data, but it never compromises security. Instead, LMS adds more layers of protection for your security.
# Resource Management
Your learning program can include multiple different types of courses, content, and users. LMS helps you to sort your data according to it. You can use it to load a lot of things, like:
- Videos
- Text
- Quizzes
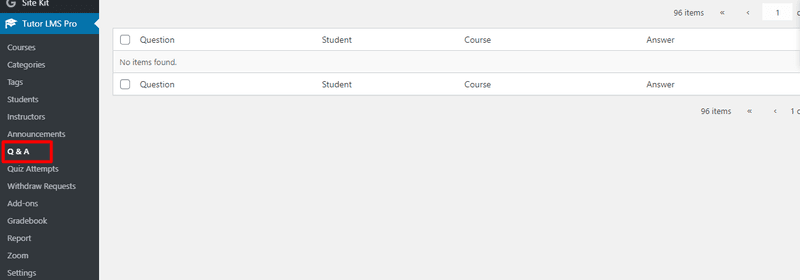
- Q&A
- Gradebook, and more!
It's also helpful in sorting it according to the type and assigning it according to your group of students.
The management system also provides you with the flexibility to add students or instructors at any time. It can also interact with payment modes and e-commerce sites for added convenience.
# Gamification
LMS does not limit creativity and provides flexible options for all ages and types of students. It also allows you to create quick quizzes and add characters to make things interesting. The LMS also provides options to load them and share them over to individuals, groups, or all your members.
# Management
LMS offers you all the options of your system on one single dashboard. You can alter your UI, add data, remove data or perform any other action using it. You can also use it for loading video content and get analytics for it. The system even has resources to make payments to instructors. And both the student and instruction sections are separate so there won't be any confusion.

# Integrations
While the LMS offers decent page builder and management features, you don't have to completely rely on it. The LMS is highly compatible with various integrations like Elementor.
LMS also integrates with Woocommerce, Google classroom, Zoom, and some common payment channels.
# Add-Ons
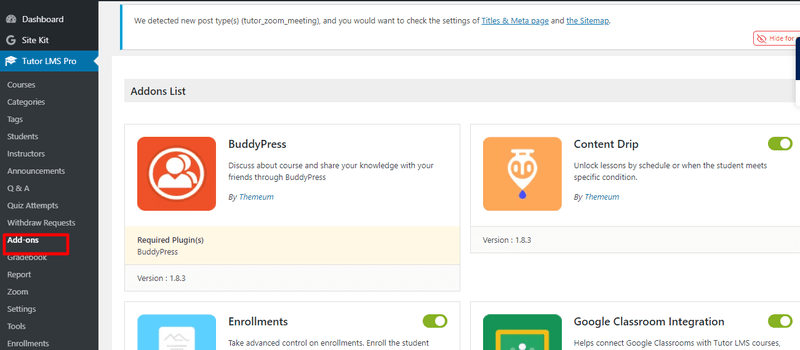
Online courses and management aren’t just about sharing content. It also needs you to directly interact with your audience and sometimes send emails, results and hold classes.
There are also things like enrolling, assignments, payment, and previews that you indeed manage. Every good LMS offers excellent support for most of these addons.
Premium Features
Every good LMS includes plus or premium features that you can unlock by buying the plus version of the application. The features include unlimited attachments, tutor emails, and more. It’s also helpful to add certification for your courses.
The premium account will add a section in the dashboard that you can use to enable/disable these features.
# Flexible Learning
Unless you are conducting a real-time class, the LMS can offer full flexibility for time. Your user can access the resource at any time and from anywhere. This remote feature waives the overheads of renting classrooms, transportation, and many others. It makes the study material more accessible and economical.
TutorLMS vs LearnPress vs Udemy/Coursera/UdaCity [Why Create Your Own eLearning Website]
You might ask, “Why should I create my own MOOC (Massive Open Online Courses) site and not sell through Udemy, Coursera, Teachable, etc.?”
Here is the answer:
- Full Control
The primary benefit is control. On platforms like SkillShare and Udemy, you have no control over the data of your students. You are limited with what you can get from and share with them. These sites roll out any changes at any time change your strategies altogether.
With the self-hosted option, you have your own rules. You have full control over your business model and all user data comes to you exclusively, and leverage it for better marketing. You can run discounts and offers as and when you want.
- Revenue
With Udemy or similar sites, you don’t own 100% of the total revenue generated from the sale of your courses. For each student who buys your course on Udemy, the platform makes a 50% commission. Eventually, you get only 50% of the total revenue you have made otherwise.
However, if you host and sell your course on your own site, then everything – profit and loss – comes to you only. Excepts for bearing the running costs of your site, you get 100% of your revenue.
- Features
With the self-hosted option, you can add desired functionality to your website or courses. You can leverage features from the LMS tool or software of your choice that often exceed those offered on a marketplace.
For instance, with the TutorLMS WordPress plugin, you can add a unique layout and so many exciting features to your site that you won’t find with Udemy, Coursera, etc.
The best part is self-hosting is quite simple. Just go through this tutorial and learn how to set up and launch your own MOOC platform in a hassle-free and cost-effective manner.
Ultimate Step-by-Step Guide to Using TutorLMS
The TutorLMS is great for selling online courses using WooCommerce over your WordPress site. However, to use it, you will first need to install its plugins and activate them.
Downloading Plugins
To install the TutorLMS, you will need to first find it. There are two different versions for this part. First is the free version that comes with basic functionality. And the second is the Premium version of TutorLMS. It comes with full functionality, including certification and analytics.
Installing TutorLMS In WordPress
The free version of TutorLMS is directly available in the WordPress store. You can use the following step to download and install it in minutes.
- Login to your WordPress account and go to the dashboard.
- Navigate down to the Plugin option and click Add new option under it.
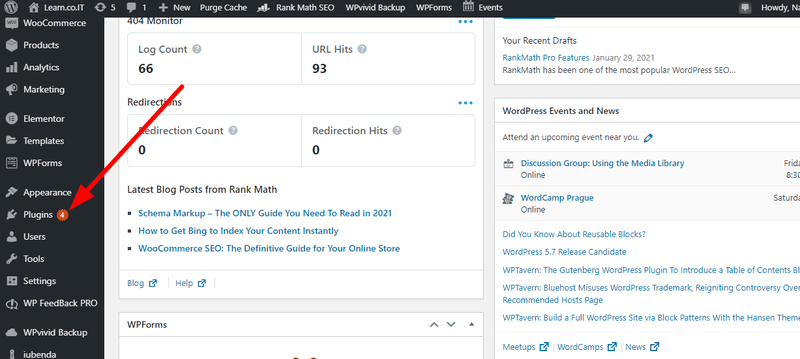
- Click on Add New and write "Tutor LMS” on the search bar on the next screen.
- Now look for the official TutorLMS plugins. It's named "Tutor LMS-eLearning and Online Course Solution."
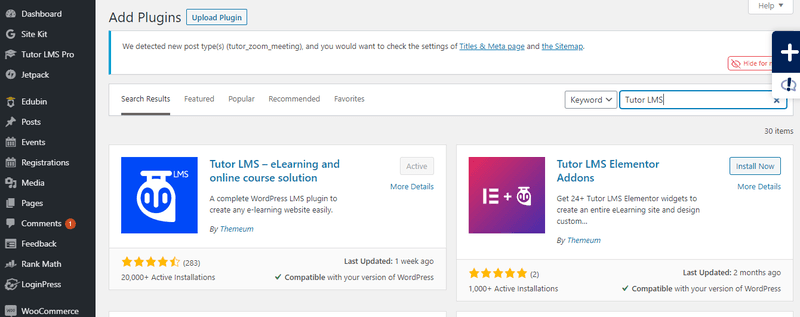
- Click the 'Install now' button next to the plugin icon and wait for WordPress to install it.
Once the plugins get installed, you will see an Activate button next to the icon. Click it to activate the extension, and you are ready to use TutorLMS. In case you miss this part, it's possible to activate the plugin from the dashboard.
Open the installed Plugin section and click the Activate button under the TutorLMS.
Installing Premium Version of TutorLMS
Unlike the free version, the premium version is not directly available and will need some effort. For it, you will need a Themeum account. You can open the website and register with an email Id.
Moreover, this plugin will need a product key to activate some features. You will get a zip file when you buy the plugin from its site. The file will contain everything you need to install and activate this version. Here's how to use it.
- Open your WordPress dashboard and then the new plugin section.
- You will see an 'Upload Plugin' option near the 'Add Plugin' heading. Click it.
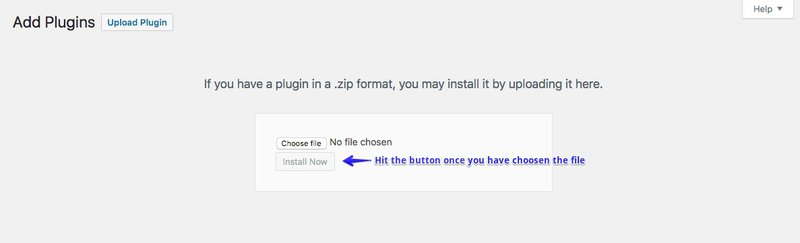
- Now, provide the path of the Zip folder and click the 'Install Now' button.
- You can also drag and drop the zip file.
WordPress will now process the file and install the premium plugin.
What type of pricing plans does TutorLMS offer?
The TutorLMS premium version is paid and will offer six different payment options for every user. There are three basic annual plans and three-lifetime plans.
- Check out free version and download here: https://wordpress.org/plugins/tutor/
Annual Plans
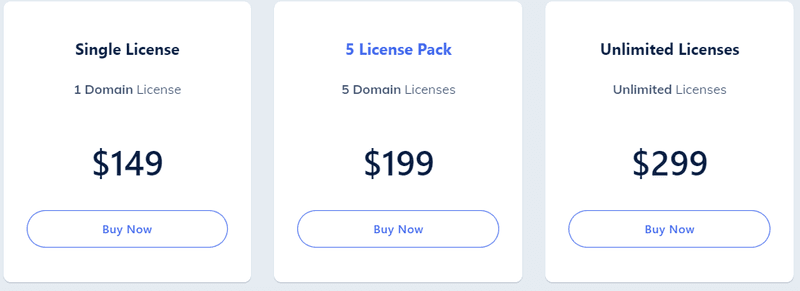
Lifetime Plans
5 License pack: $599/ one-time
Unlimited License: $999/ one-time
Each of these plans comes with a money-back guarantee and added benefits. You can get a refund for them within 30 days.
TutorLMS also takes responsibility for the speedy delivery of its services. You will receive your plans related data and files within 48 hours. The same time limit also applies to the refund.
The Best part is that the channel doesn't have an auto-renewal. They will notify you before your plans end so you can step up and step down any time.
The product also comes with a 30% discount for non-profit sites. You can contact Themeum or email them for discounted deals.
How to add courses to TutorLMS?
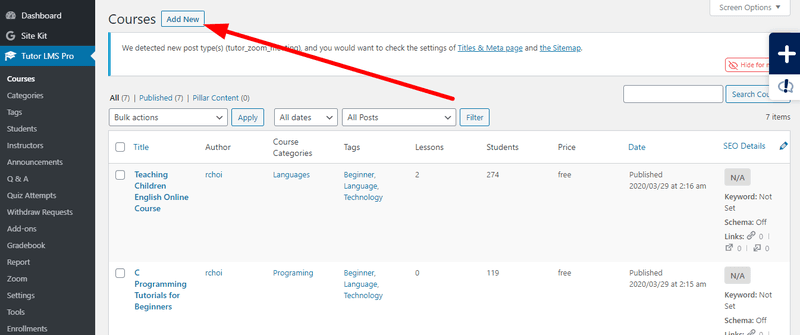
Once the TutorLMS gets installed, you will get an option for it on your dashboard. Usually, it's the second option from the top, right after the Dashboard button. This button named "Tutor LMS" provides the option to create new courses and add data for them.
- Head to the dashboard and click the LMS button.
- It will open a WordPress writing window with the heading "Add New Course."
- Now fill in the name of your course and a little overview of it in the provided sections.
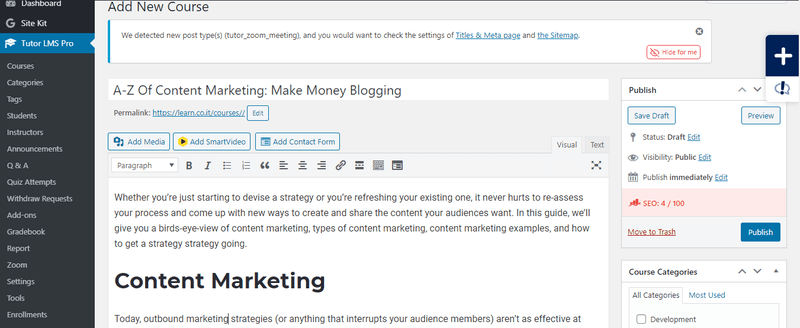
- You can also use this tab to establish the category of the course and add tags for it.
- After setting this part, scroll down to the course setting section.
- Here, select the course level and then move to content.
- You will also see a radio button for course type- Paid or free. Select your preference.
Adding Titles and Content to The Course
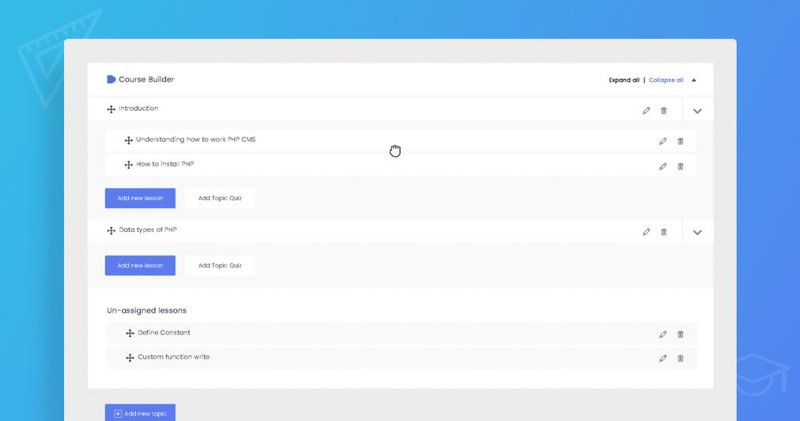
Adding content and topics for your course is very simple and won't need much time. Here's how you can do it quickly.
- Click on the 'Add new Lesson' button in the new course settings.
- The part also has a button for Quizzes next to the new lesson button. You can use it for uploading quizzes of your course.
- WordPress will provide you with a writing screen with space for the topic and its related data. Fill it.
- It's also essential to set the format and the sizes of all your data.
- You can also consider adding a featured image for the topic.
- Once everything is ready, save it.
- Now, scroll down from your course builder section.
- Here you will find the additional topic for uploading your course.
- You need to fill in the duration of your course, its benefits, and prerequisites.
- There's also a section to specify the target audience for better marketing.
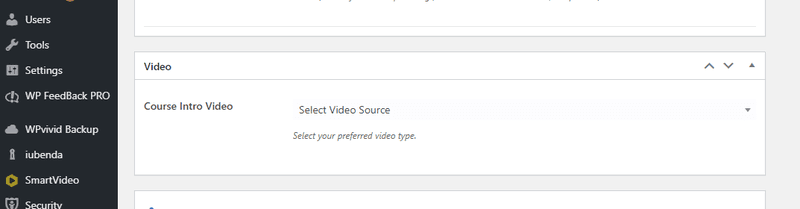
- Then scroll further down below to the intro video section.
- You will notice a small space for the course intro video with a small drop-down arrow.
- Click on the drop-down to select the source link type for your video (refer to the video uploading section for it).
- Then provide the embedded video link and scroll down to the next section.
- This section is for the course announcement.
- It will include a title and a message that you want to send.
Now, finalize your content, check every part and save it. WordPress uploads the video and processes the announcement automatically.
Uploading Videos On TutorLMS
TutorLMS does not have an inbuilt storage system, but it offers support for various sources for it. You can connect it with YouTube, Vimeo and also use self-hosted HTML5 videos with it.
Though it's always best to use a dedicated video host for this part. It ensures the safety of your data and prevents issues like piracy.
Either way, the process of uploading data will remain identical in each case.
- Head back to the course creation section and then the course builder.
- In course builder, scroll down from the title and description area, and you will find a video section.
- You can use this section to upload video sessions.
- Simply click on the video source, add the video links and fill in the video duration.
- You can also consider adding subtitles to it.
- There's an "Upload Attachment" button for adding them.
- Now, click the update session, and WordPress will upload your video tutorial.
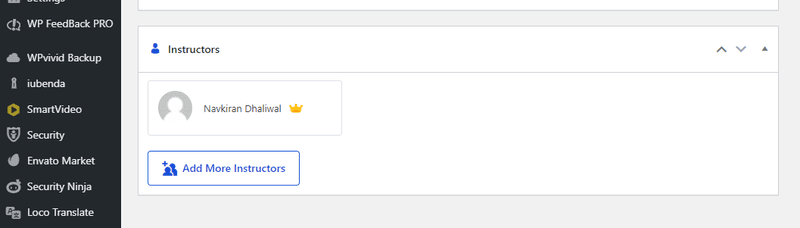
Adding Instructors
There is a small section for instructors on the course creation tab. You can use this part to add some detail about you or the instructor heading the course. It's good to build credibility.
But, you will need to add an instructor for this part.
- Open 'Tutor LMS' options in your dashboard and click 'Instructor' in it.
- It will open a new tab with several different sections asking for the instructor's details.
- You have to provide a name, username, email id, phone number and also create a strong password.
- There is also a bio section to tell you about your background and skill levels.
Provides the necessary detail, and then click the Add New instructor button at the bottom. You can add multiple instructors working with you.
Once you do it, the instructor section of your course will show a list of all the instructors you can add to the course.
General Setting of the Course
If you have read the above data, you know that the whole course uploading part never mentions the earning part. Well, that's because the earning and other similar settings will not come under the course creation part. You have to follow the step below for it.
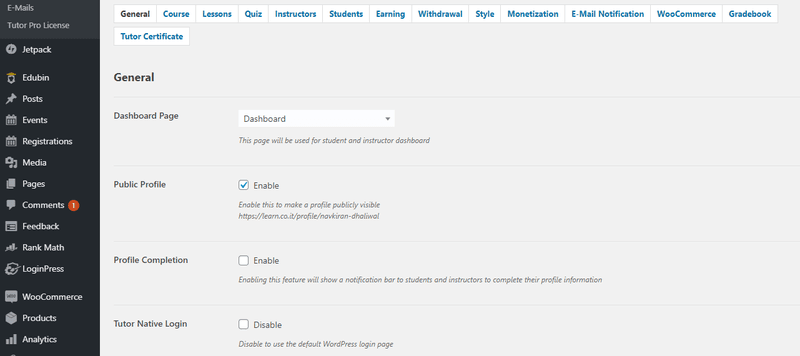
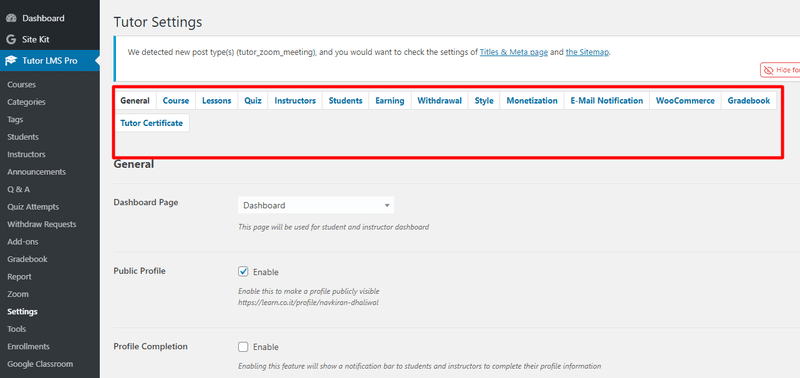
- Click on the 'Setting' option under the 'Tutor LMS' section of your WordPress dashboard.
- In the section that opens, you will find different setting options, including general settings, course settings, quiz settings, and more. Click the "Earning" section in it.
- Under this section, you will find a checkbox for enabling/disabling earning.
- Then there are sections for the Admin commission, instructor commission, fee deductions, and account statement.
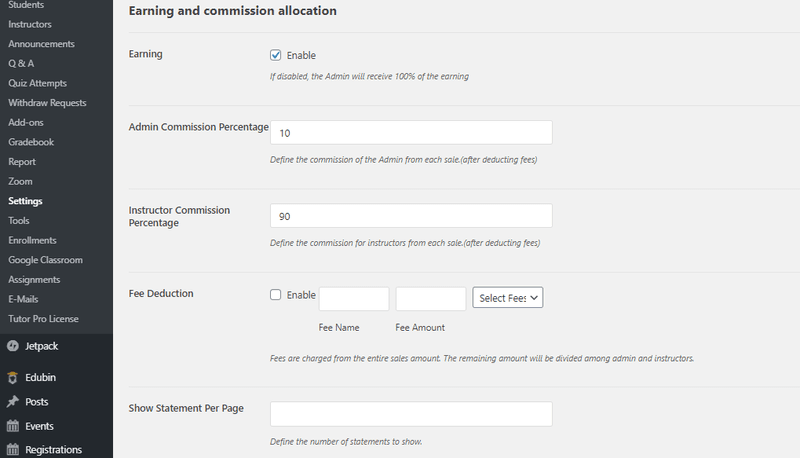
- Provide the details, save them, and then move to the Withdrawal section.
- In this section, you can set your payment method and the minimum/maximum withdrawal limits.
The instructors you add can also access the setting of your course. But, they get limited options. None of the admin settings are visible for them.
Setting Costs
Changing the payment setting will set parameters for the earning of your course. However, you still need to define the cost that you want to charge for it. Usually, you need to use a payment or e-commerce extension for this part.
Most people prefer WooCommerce for this part, so let's see how you can use this plugin.
- Firstly head to the plugin section and search for the WooCommerce add-on.
- You can then install and activate as you did for the TutorLMS.
- Now you will see a section of WooCommerce in the dashboard. Click this section and select 'Add new product.'
- In the title section that says 'Name of Product,' fill the name of your course.
- Then scroll down and click on the checkmark "For Tutor." It ensures your course does not go to the general product section.
- Next to it, you have two spaces for filling the regular and sale price of your product.
- Now, click on the 'Set Product image' option and add an image for the product.
- Make sure you use the feature image of your course for this section.
- Save the product detail and exit this tab.
- Now, head back to your course and scroll down to the "Add Product." Section. (reload if it's already opened)
- Select the name of the course in the drop-down here.
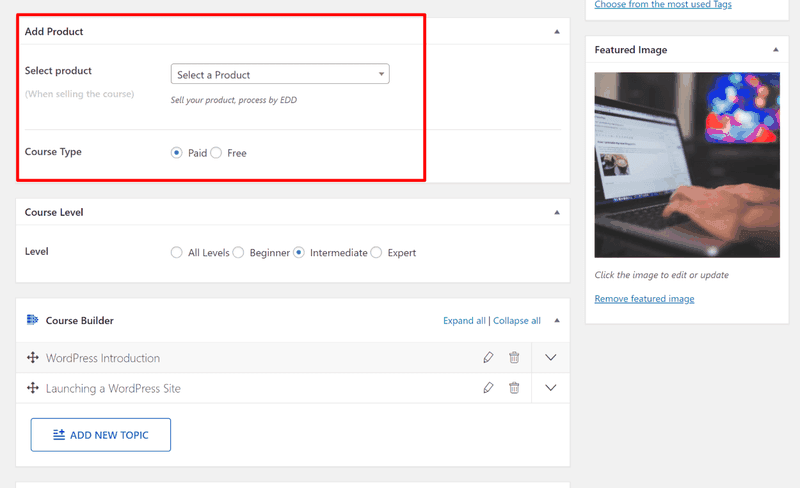
WordPress will now combine the course and the product detail that you added. Once you reload its preview, you will see an "Add To Cart" option under your course. Your audience can use this option to buy the course anytime.
Wrapping Up
After reading this guide, it’s clear that TutorLMS is a polished plugin. Featuring a convenient back-end interface, the plugin makes it quite easy to create an online course website without coding skills.
In addition to this, the front-end experience is really nice, complete with a great Q&A feature. With this tool, you can achieve building, monetizing, as well as administration of your courses. This WordPress plugin is also compatible with themes like OceanWP, Astra theme, Storefront, and Divi. So, use this completely UI-based WordPress LMS plugin to support your entire course-creation journey.
Obviously, the tool has enough room for improvement. TutorLMS comes with regular improvement and updates by the dev team. So, keep checking with their official website to track these updates.
Reference: TutorLMS documentation: https://docs.themeum.com/tutor-lms/